
Are you getting short of internal space in your iPhone, iPad or iPod? Is your device lagging and performance is not up to the mark? Want an everlasting solution to permanently erase redundant data? , then you are at the right place.
You might have heard that data on Apple devices never gets perpetually erased, it keeps lying in some dirty corner of device and keeps on taking out its scoop of internal memory, giving rise to under – optimum performance of devices.
Someone who is trying to breach in your personal life can easily collect these data files by recovering them out of your phones, giving rise to security concerns. Quick question.
How to protect your privacy and keeps intruders out of your domain? There are galore of apps present in the market that can help you to demarcate and protect your privacy like iPhone Data Eraser, iSkySoft Phone Transfer, iPhone Data Cleaner, PhoneClean, iShredder, iOS Data Eraser, ViboSoft iPhone/iPad/iPod Data Cleaner, Coolmuster iOS Eraser, Macgo Free iPhone Cleaner, iMyFone Umate Pro and iPhone, iPad, iPod Data Cleaner.
iMyFone Umate Pro
Overview-
- Perpetually erase all or selected current & deleted data with zero possibility of recovery in one click.
- Smear out all kinds of iOS data: messages, call logs, contacts, photos, videos, etc.
- Erase Third-Party apps and associated fragments of data: WhatsApp, WeChat, Kik, Viber etc.
Supported Devices and OS-
Note: – Supported OS is iOS 7.0 and later.
iPhone-
iPhone 7 Red, iPhone 7 Plus, iPhone 7, iPhone SE, iPhone 6s Plus, iPhone 6s, iPhone 6 Plus, iPhone 6, iPhone 5s, iPhone 5c, iPhone 5, iPhone 4s, iPhone 4.
iPad-
All models of iPad Air, iPad mini, iPad Pro and iPad.
iPod touch-
iPod touch 6, iPod touch 5, iPod touch 4, iPod touch 3, iPod touch 2, iPod touch 1.
Supported File Types which is Erasable-
Message & iMessage, Contacts, Call History, WeChat Messages & Attachments, Safari, iCloud ID, Voicemail, Reminders & Calendar, Facetime, Photos, Apps, WhatsApp Messages & Attachment, Videos, Apple Maps, System Settings and many more apps.
How to use it? User Guide-
Once successfully installed, bring it to foreground by tapping its icon and follow the given steps-
FRAGMENT ONE (Erasing Private Data)
Connect your device to Mac.
Do this by attaching USB cable to phone and Mac.
Choose Erase Mode scan.
Select Erase Private Data option on the left – side column, Click Scan button to scan and investigate your device.
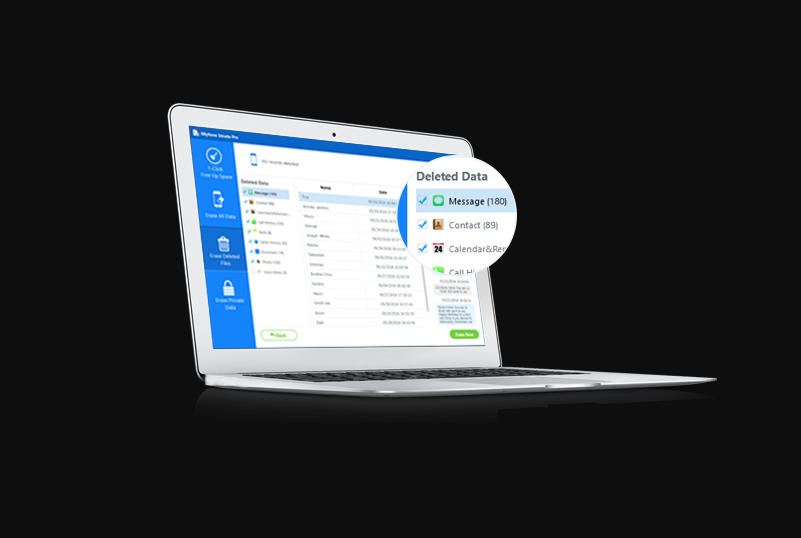
Screening and Selecting Data.
After the scan is done, all of your privies data including photos, messages, notes etc. are itemized. You can click any data to screen it. Then select the data that you want to permanently erase.
Select Security level and Corroborate.
Hit the Erase Now key to delete your selected privies files perpetually. Then type “delete” in the box.
Start to Erase.
After you type “delete” in the box to corroborate your action, click the Erase Now key to delete the private data.
FRAGMENT TWO (Erasing Already Deleted File)
Connect your device to Mac.
Do this by attaching USB cable to phone and Mac.
Choose Erase Mode scan.
Select Erase Deleted Data option on the left – side column, Click Scan button to scan and investigate your device.
Screening and Selecting Data.
After the scan is done, all of your deleted files are itemized. You can click any data to screen it. Then select the data that you want to permanently erase and click “Erase Now” button to erase them.
Start to Erase.
After you type “delete” in the box to corroborate your action, click the Erase Now key to delete permanently your deleted data.
FRAGMENT THREE (Deleting all data)-
Connect your device to Mac.
Do this by attaching USB cable to phone and Mac.
Choose Erase Mode scan.
Select Erase All Data option on the left – side column, Click Erase button to permanently delete all data in your phone.
Select Security Level and Corroborate.
Enter “delete” within the box to confirm. If you want to alter the security level, you can click the link to change the level.
Start to Erase.
After you type “delete” in the box to corroborate your action, click the Erase Now key to delete permanently all of your existing data.
FRAGMENT FOUR (One Hit to Free Up space)-
Connect your device to Mac.
Do this by attaching USB cable to phone and Mac.
Scan your device for space efficient examination.
Hit “Quick Scan” to allow iMyFone Umate Pro investigate and scan data for how much space can be efficiently saved.
Start to clean.
After scanning, you can click each clean button to activate all the space – liberating processes with just a few stages.
After cleaning, you will see flashed message of how much space has been freed and how much space can be regained by other functions. Then you can choose any part to continue.
Leave a Reply
You must be logged in to post a comment.